Hi, I experienced an issue where end users received an HTTP 421 error when connecting to a VMware Horizon web after it was upgraded to 2306.
What is an HTTP 421 error?
The HTTP 421 Misdirected Request client error response code indicates that the request was directed to a server that is not able to produce a response. This might be possible if a connection is reused or if an alternative service is selected.
Symptoms:
While connecting to Horizon over an HTML Web console, users encounter an error 421.
Cause:
The default value of the security configuration setting allowUnexpectedHost has changed from true to false.
This means that connections using the name or IP address of a proxy, gateway, or load balancer that is not defined in locked.properties will fail, even if checkOrigin and enableCORS are both set to false.
Resolution:
Add security configuration setting allowUnexpectedHost = true in your locked.properties in connection servers after that restart Horizon services.
You can find locked.properties from below address:
If you want to Update the Unified Access Gateway Appliance (UAG), You have two methods: 1- Update it Manually. 2- Update with PowerShell. In this post, I talk about updating UAG with PowerShell.
What is UAG?
Unified Access Gateway equips remote workers anywhere, anytime with secure access to Horizon virtual desktops and applications.
How can I update it?
UAG doesn’t have an update engine solution on itself. You must install it again from scratch, and replace the configuration on it. You must spend more time installing it again. But you can use the PowerShell script for quick deployment.
What is the requirement?
1- You need to download Unified Access Gateway (UAG) PowerShell Scripts.
2- You need to download the INI file of the UAG configuration.
3- You need to download the OVF Tool. (The PowerShell deploy script requires these tools)
1-1 -Install the OVF Tool on the VM where you are going to run the UAG Deploy script.
1-2 – Click Next, after that:
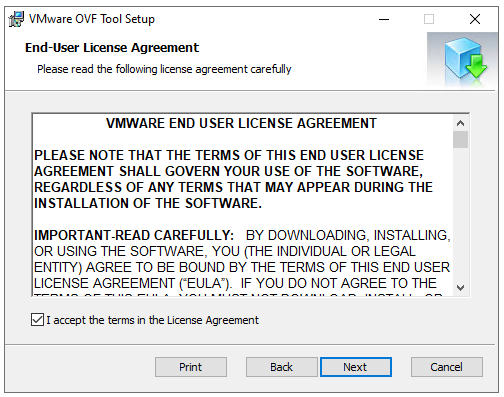
1-3 – I accept the terms in the License Agreement. Then:
1-4 – Choose the destination Folder, Then:
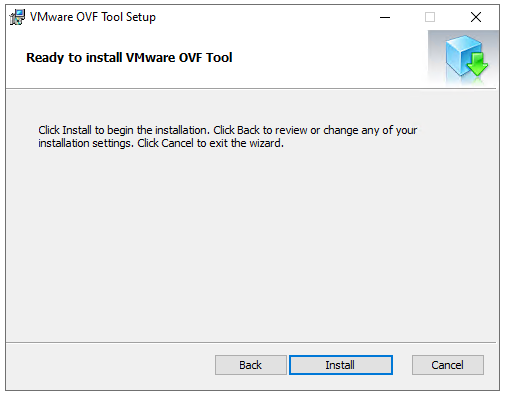
1-5 -Install it.
1-6- Finally, Click on the Finish button
Step 2– Download the Unified Access Gateway OVA from the Customer Connect portal to your machine.
You download the latest version.
Step 3– Create an INI configuration file for the Unified Access Gateway virtual appliance.
3-1 – Login to UAG server: https://UAG_Address_Server:9443/admin, Then:
3-2 – Click on the Configure Manually button, Then:
3-3 – In the Support Settings Section, Click on the INI and download it. Then:
Step 4– Download the Unified Access Gateway (UAG) XXX PowerShell Scripts files into a folder on the machine. The ZIP files are available on the Customer Connect page for the Unified Access Gateway.
4-1 – Extract the Zip file and copy and paste the UAG ova file and INI file here. Then:
Step 5– open UAG_Settings.ini, you need to configure these parameters:
5-1 – You can choose diskMode deployment is thin or thick:
diskMode= thin
5-2 – You must write the vsphere datastore name for deploying UAG OVA. Then:
ds= vsanDatastore
5-3 – Give a name for your UAG VM.Then:
name= khoshraftar-UAG01
5-4 – Enter the Backend Network port group.Then:
netBackendNetwork= Edge-PG-MGMT-V3001
5-5 – Enter the Internet Network port group.Then:
netInternet= khoshraftar-DMZ
5-6 -Enter the management Network port group.Then:
Hi, Today I would like to configure Multifactor Authentication for Horizon8 through Keycloak.
What is MFA?
Multifactor authentication (MFA) is a multistep account login process that requires users to enter more information than just a password. For example, along with the password, users might be asked to enter a code sent to their email, answer a secret question, or scan a fingerprint.
Which MFA Protocol Supports Horizon?
You can enable a Connection Server instance for RSA SecurID authentication or RADIUSauthentication by modifying Connection Server settings in Horizon Administrator.
Prerequisites
Install and configure the two-factor authentication software, such as the RSA SecurID software or the RADIUS software, on an authentication manager server.
1- For RSA SecurID authentication, export the sdconf.rec file for the Connection Server instance from RSA Authentication Manager. See the RSA Authentication Manager documentation.
2- For RADIUS authentication, follow the vendor’s configuration documentation. Make a note of the RADIUS server’s hostname or IP address, the port number on which it is listening for RADIUS authentication (usually 1812), the authentication type (PAP, CHAP, MS-CHAPv1, or MS-CHAPv2), and the shared secret. You will enter these values in Horizon Administrator. You can enter values for a primary and a secondary RADIUS authenticator.
Procedure
Log into Horizon Server, and select View Settings> Servers.
On the Connection Servers tab, select your connection server and click Edit.
On the Authentication tab, from the 2-factor authentication drop-down list in the Advanced Authentication section, select RADIUS.
To force RADIUS usernames to match usernames in Active Directory, select Enforce 2-factor and Windows username matching.
If you select this option, users must use the same RADIUS username for Active Directory authentication. If you do not select this option, the names can be different.
For RADIUS authentication, complete the rest of the fields:
Select Use the same username and password for RADIUS and Windows authentication if the initial RADIUS authentication uses Windows authentication that triggers an out-of-band transmission of a token code, and this token code is used as part of a RADIUS challenge.
If you select this check box, users will not be prompted for Windows credentials after RADIUS authentication if the RADIUS authentication uses the Windows username and password. Users do not have to reenter the Windows username and password after RADIUS authentication.
From the Authenticator drop-down list, select Create New Authenticator and complete the page.
6. Click Add
Give a name for the Authenticator name field. This name is displayed when users want to log in. You can customize username and passcode labels.
7. Click nextGive your Keycloak Radius information
Hostname/Address: keycloak.khoshraftar.com\
Authentication Port: 1812
Accounting Port: 0
Set the Accounting port to 0 unless you want to enable RADIUS accounting. Set this port to a non-zero number only if your RADIUS server supports collecting accounting data. If the RADIUS server does not support accounting messages, and you set this port to a nonzero number, the messages will be sent and ignored and retried a number of times, resulting in a delay in the authentication.
Accounting data can be used in order to bill users based on usage time and data. Accounting data can also be used for statistical purposes and for general network monitoring.
Authentication Type: PAP-CHAP-MSCAHP1-MSCHAP2
Shared Secret: ***********
Must same with your radius shared secret
If you specify a realm prefix string, the string is placed at the beginning of the username when it is sent to the RADIUS server. For example, if the username entered in Horizon Client is Mohammad and the realm prefix Khoshraftar\ is specified, the username khoshraftar\Mohammad is sent to the RADIUS server. Similarly, if you use the realm suffix, or postfix, string @khoshraftar.com, the username mohammad@khoshraftar.com is sent to the RADIUS server.
Click Next
8. Click OKto save your changes.
You do not need to restart the Connection Server service. The necessary configuration files are distributed automatically, and the configuration settings take effect immediately.
What is Keycloak?
Keycloak is an open-source identity and access management solution.
How to install Keycloak?
You can download Keyclock from here. But for this project, I need to Radius, radius is not on Keycloak default. So, you can config a manual radius from this link.
But, I want to write a simple configuration about keycloak radius in my blog.
I download a java base keycloak application from here.
I installed an Ubuntu server and install an openjdk 11 on it.
12. Under Manage–> Select Clients and Create client
13. Choice radius protocol from the drop-down menu and Fill in a Client ID
Note: This name must be the same as the authenticator name in the Horizon config in the previous section.
14. Click Next
15. Click Save
16. Click on the Users section and click Add Users
Note: If you want to log in with a password, leave the required user actions, Blank.
Click on Create and then click on the user that you created.
17. Click on the Set password button. Type your password and If you turn on Temporary you must change your password in the first login. I turn off it. And Save it.
Note: If you want to use an OTP, select Configure OTP from the menu
You go to step 17 and create a password for your user and then go to this page.
Hi, Today I decided to publish Application Hosted on RDSH Servers.
The published applications feature supports a wealth of remote-experience features, which include client-drive redirection, access to locally connected USB devices, file-type association, Windows media redirection, content redirection, printer redirection, location-based printing, 3D rendering, smartcard authentication, and more.
After applications are published, end users launch Horizon Client, or the HTML Access web client, to access a catalog of published applications. Selecting an application from the catalog opens a window for that application on the local client device, and the application looks and behaves as if it were locally installed.
1- In the Horizon Console, navigate to Inventory > Applications, click the Add button, and select Add from Installed Applications.
1- For the Application Pool Type, leave the default, which is RDS Farm. The server farm I created in the previous post should be displayed in the drop-down list.
3- Complete the Select Applications page, as follows, before clicking Next.
Note: Select the Entitle Users After Adding Pool check box.
4- Next
5- Submit
6- In the Add Entitlements dialog box, click Add.
7- Use the Find User or Group dialog box to search for users.
8- From the list of users and groups returned, select the users or groups to entitle, and click OK.
9- In the Add Entitlements dialog box, verify that the desired users or groups now appear in the list, and click OK.
10- Launching Remote Desktops and Applications from Client Devices
you can use the HTML Access web client by entering the URL of your Connection Server, using the following format:
Hi, Today I want to config an Instant-Clone Desktop Pool.
Deploy an Instant-Clone Desktop Pool
1- In the Horizon Console, navigate to Inventory > Desktops, and click the Add button.
2- In the Add Pool wizard that opens, with Type selected in the left pane, select Automated Desktop Pool, and click Next.
3- On the vCenter Server page, select Instant Clone, and click Next.
4-On the User Assignment page, select Dedicate and click Next. Instant-clone pools can use either Dedicated or dedicated user assignments.
Dedicated assignment – Each desktop is assigned to a specific user. A user logging in for the first time gets a desktop that is not assigned to another user. The user always gets this same desktop after logging in, and this desktop is not available to any other user.
Floating assignment – Users get a random desktop every time they log in. When a user logs out, the desktop is deleted. With automatic deletion, you keep only as many VMs as you need at one time.
5- On the Storage Optimization page, select Use separate datastores for replica and OS disks, and click Next.
6- On the Desktop Pool ID page, complete the settings, as follows, before clicking Next:
7- On the Provisioning Settings page, complete the settings, as follows, before clicking Next:
Naming Pattern – I use ِDP-0.
Provision Machines – Select All Machines Up-Front
Desktop Pool Sizing – Set Maximum Machines to 3, and set spare (Powered On) Machines to 1.
Use the defaults for the other settings.
8- On the vCenter Settings page, complete the Default Image settings, as follows:
a. For the Parent VM in vCenter setting, click Browse to select the golden Windows 10 VM you created
b. For the Snapshot setting, click Browse to select the snapshot you created as part of the prerequisites, and click Submit.
9- In the Virtual Machine Location section, click Browse to select a VM folder if you created one as described in the prerequisites for this exercise.
10- In the Resource Settings section, click Browse to select the appropriate vCenter resource for each setting. As with the other settings on this page, to complete each setting, you will select from the resources that are already set up in your vCenter Server and that are specific to your environment. Important: For the Network setting, leave the default, which means the Use network from current parent VM image check box is selected.
11- With the vCenter Settings page completed, click Next.
12- On the Desktop Pool Settings page, leave the defaults and click Next.
13- On the Remote Display Settings page, select the Allow Session Collaboration check box, and click Next.
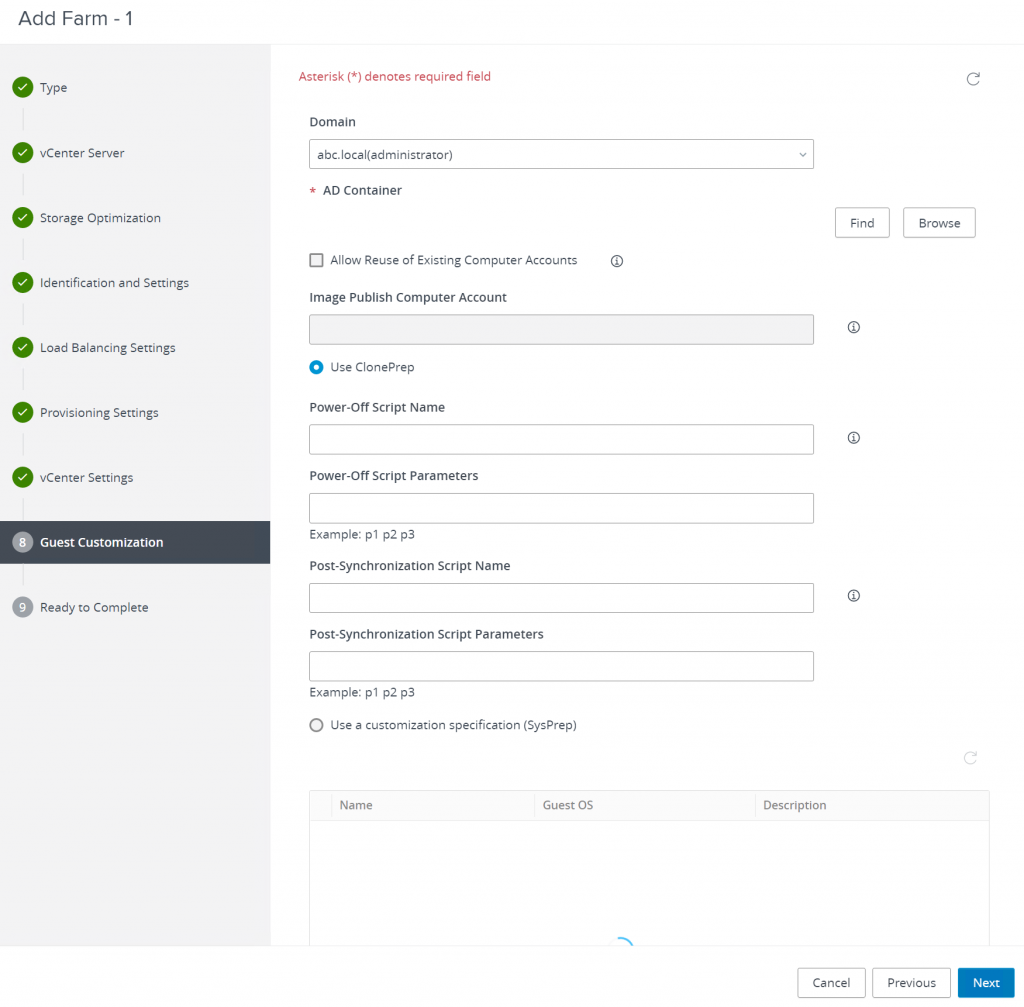
14- Complete the Guest Customization page, as follows:
15- On the Ready to Complete page, click Submit. You are returned to the Inventory > Desktops page, called Desktop Pools.
2- Create OUs for Instant-Clone Desktops and RDSH Servers and Delegate Control
3- Add an instance – Clone Domain Administrator
4- Add Domain Bind
Create the Domain Admin User
Note: This step is optional.
1- On the Active Directory Domain Controller machine, log in as an administrator, and go to the Start button > Administrative Tools > Active Directory Users and Computers.
2- Add a user: Expand the domain, right-click Users, select New, and select User.
3- Complete the New Object – User dialog box that appears.
Note: my username that was created is Horizon-domain-user. You can choose your username.
Create OUs for Instant-Clone Desktops and RDSH Servers and Delegate Control
1- On the Active Directory Domain Controller machine, log in as an administrator, and go to the Start button > Administrative Tools > Active Directory Users and Computers.
2- Right-click the domain name, select New, and select Organizational Unit.
3- In the New Object – Organizational Unit dialog box, enter a name, such as Instant Clones, and click OK. This OU is the Active Directory container in which the instant-clone computer accounts will be created. After you complete the text box, you can find the OU under the domain.
4- Right-click this OU you just created (which is the container) and selected Delegate Control. The Delegation of Control wizard appears.
5- Click Next on the Welcome page and Add on the Users or Groups page.
6- Enter the name of the domain user you just created; click Check Names, to verify that the name can be found in Active Directory, and click OK.
7- When you are returned to the Users or Groups page, click Next.
8- On the Tasks to Delegate page, select Create a custom task to delegate, and click Next.
9- On the Active Directory Object Type page, select the following checkboxes before clicking Next:
– Computer objects
– Create selected objects in this folder
– Delete selected objects in this folder
10- On the Permissions page, select the following checkboxes in the Permissions section before clicking Next:
– Create All Child Objects
– Delete All Child Objects
– Read All Properties
– Write All Properties
– Reset password
11- On the last page of the wizard, click Finish. The user account now has the following complete list of required permissions, including permissions that are assigned by default:
– List Contents
– Read All Properties
– Write All Properties
– Read Permissions
– Reset password
– Create Computer Objects
– Delete Computer Objects
How to add an instance – Clone Domain Administrator?
You use the Horizon Console to specify the user account for joining instant-clone VMs to the Active Directory domain.
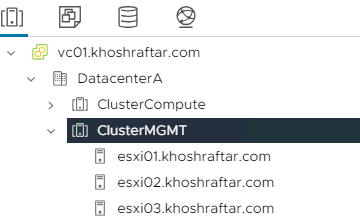
In my case, I have two domains:
1- for management domain: That name is khoshraftar.com
2- for client domain: that name is abc.local
For this purpose, I used an account that we created in this post.
1- In the Horizon Console, navigate to Settings > Instant Clone Domain Accounts, and click the Add button.
2- On the Add Domain Admin page that appears, select the domain from the list, and enter the username and password for the user you created. I used administrator user account.
Click ok.
How to add Domain Bind
Before that, the first step is we define each domain as a conditional forwarder in each DNS servers.
1- open the DNS console khoshraftar.com and add a conditional forwarder :
2- open the DNS console abc.local and add a conditional forwarder :
Check with PowerShell commands:
1- In the Horizon Console, navigate to Settings > Domains > Domain Bind, and click the Add button.
Hi, today I created an Event database to log Horizon events to a SQL Server instance, making the event data available to analytics software. For example, you can find the following types of events in the database:
Alerts that report system failures and errors
End-user actions, such as logging and starting desktop and application sessions
Administrator actions, such as adding entitlements and creating desktop and application pools
Statistical sampling, such as recording the maximum number of users over a 24-hour period.
Prerequisites for Setting Up the Events Database
SQL Server instance – This is the database server on which you will create the Events database.
Microsoft SQL Server Management Studio
Microsoft SQL Server Configuration Manager
SA credentials – To create the necessary logins for the database, you will log in to the SQL Server instance as the sysadmin (SA) or as a user account with SA privileges.
How to install and configure the Events Database?
1- Click on SQL Server Installation and then Click on New SQL server
2- Select Specify a free edition or Enter your product key
3-Acept license Term
4-
5-Select Default and Next
6- Default Server Configuration and Next
7- Select Mixed Mode and enter a password for sa username and add domain administrator account for SQL server administrator
8- Click on Install
9-Finish
10-Install Microsoft SQL Server Management Studio
11- In the Object Explorer, right-click Databases, and select New Database from the submenu. Name the database and click OK.
Hi, today I want to install Replica Connection Server.
How to install Horizon Replica server?
1- Create two VMs and install two Windows servers and join them to your domain.
Guest OS – Microsoft Windows Server 2019 CPU – 4 Memory – 4 GB New Hard Disk – 40 GB New SCSI Controller – LSI Logic SAS Network Adapter Type – VMXNET3
2- Download Connection server from this link and copy it to connection server’s VM.
3- Welcome page, Next
4- License Agreement, Next
5- Destination Folder
6- Installation Options
Standard installation – Generates a Connection Server instance with a new Horizon LDAP configuration.
Replica installation – Generates a Connection Server instance with a Horizon LDAP configuration that is copied from an existing instance.
Enrollment Server installation – Installs an enrollment server that is required for the True SSO (single sign-on) feature, so that after users log in to VMware Workspace ONE Access, they can connect to a remote desktop or application without having to provide Active Directory credentials. The enrollment server requests the short-lived certificates that are used for authentication.
I select Horizon Replica Server, Next.
7- On the Data Recovery page, enter the password you want to use for recovering data backups of the Connection Server.
8- Enter First Horizon Server HostName
9- On the Firewall Configuration page, accept the default, which is Configure Windows Firewall automatically.
10- On the Initial Horizon Administrators page, for this exercise and for simplicity, I recommend authorizing an Active Directory domain group.
11- On the User Experience Improvement Program page, you can deselect the Join the VMware Customer Experience Improvement Program option to opt out of the program.
12- On the Ready to Install page, leave the default for the drop-down list, which is General, to indicate that you are deploying the Connection Server in an on-premises environment, and click Install.
12- On the Installer Completed page, click Finish.


 7.
7. 


