Hi, I want to enable SNMP v3 manually on my ESXi 7.0.
In ESXi 5.1 and later releases, the SNMP agent adds support for version 3 of the SNMP protocol, offering increased security and improved functionality, including the ability to send informs.
As an alternative to configuring SNMP manually using esxcli commands, you can use host profiles to configure SNMP for an ESXi host.
By default, the embedded SNMP agent listens on UDP port 161 for polling requests from management systems. You can use the esxcli system snmp set command with the –port option to configure an alternative port. To avoid conflicting with other services, use a UDP port that is not defined in /etc/services.
Procedure
1- (Optional) If you want to change the default port, you could use this command:
esxcli system snmp set --port port
2- Every SNMP v3 agent has an engine ID which serves as a unique identifier for the agent. The engine ID is used with a hashing function to generate keys for authentication and encryption of SNMP v3 messages. If you do not specify an engine ID, when you enable the SNMP agent, an engine ID is automatically generated.
esxcli system snmp set --engineid id
Here, id is the engine ID and it must be a hexadecimal string between 5 and 32 characters long.
esxcli system snmp set --engineid 80001ADC05876457531638093177
3- SNMPv3 optionally supports authentication and privacy protocols.
Authentication is used to ensure the identity of users. Privacy allows for encryption of SNMP v3 messages to ensure confidentiality of data. These protocols provide a higher level of security than is available in SNMPv1 and SNMPv2c, which use community strings for security.
Both authentication and privacy are optional. However, you must enable authentication to enable privacy.
esxcli system snmp set --authentication protocol
Here, protocol must be either none(for no authentication), SHA1, or MD5.
esxcli system snmp set --privacy protocol
Here, protocol must be either none(for no privacy) or AES128.
esxcli system snmp set -a SHA1 -x AES128
4- You can configure up to 5 users who can access SNMP v3 information. User names must be no more than 32 characters long.
While configuring a user, you generate authentication and privacy hash values based on the user’s authentication and privacy passwords and the SNMP agent’s engine ID. If you change the engine ID, the authentication protocol, or the privacy protocol after configuring users, the users are no longer valid and must be reconfigured.
esxcli system snmp hash --auth-hashsecret1--priv-hash secret2
esxcli system snmp hash -r -A password1 -X password2Authhash: 08248c6eb8b333e75a29ca0af06b224faa7d22d6
Privhash: 232ba5cbe8c55b8f979455d3c9ca8b48812adb97
5- Configure the user
esxcli system snmp set --user userid/authhash/privhash/security
esxcli system snmp set --usersuser1/08248c6eb8b333e75a29ca0af06b224faa7d22d6/232ba5cbe8c55b8f979455d3c9ca8b48812adb97/priv
Parameter
Description
userid
The user name.
authhash
The authentication hash value.
privhash
The privacy hash value.
security
The level of security enabled for that user, which can be auth (for authentication only), priv (for authentication and privacy), or none (for no authentication or privacy).
6- (Optional) If the ESXi SNMP agent is not enabled, run the following command:
esxcli system snmp set --enable true
7- (Optional) Send a test notification to verify that the agent is configured correctly.
We want upgrade vRops 7.5 to 8.5. There are some software update best practice:
Take a snapshot of your deployed vRealize Operations clusters or back them up before you begin the software update. See the release notes for details on how to snapshot correctly.
Run the pre-upgrade assessment tool before the upgrade. This is imperative and will provide you with a list of impacted content caused by the removal of numerous metrics from the product. Ignoring this step may potentially lead to broken content.
Remove your snapshots after the software update completes or you may experience performance degradation.
Ok, let start the upgarde.
1- Login to your vRops admin UI:
https://your-ip/admin
2- Take cluster into offline status
3- Then go to the System Status section
4- Press Install a software update button and select your update file. Update files format must be *.PAK .
5- Then press upload button
6- If you have get error that means you dont have enough space, you can check you server space
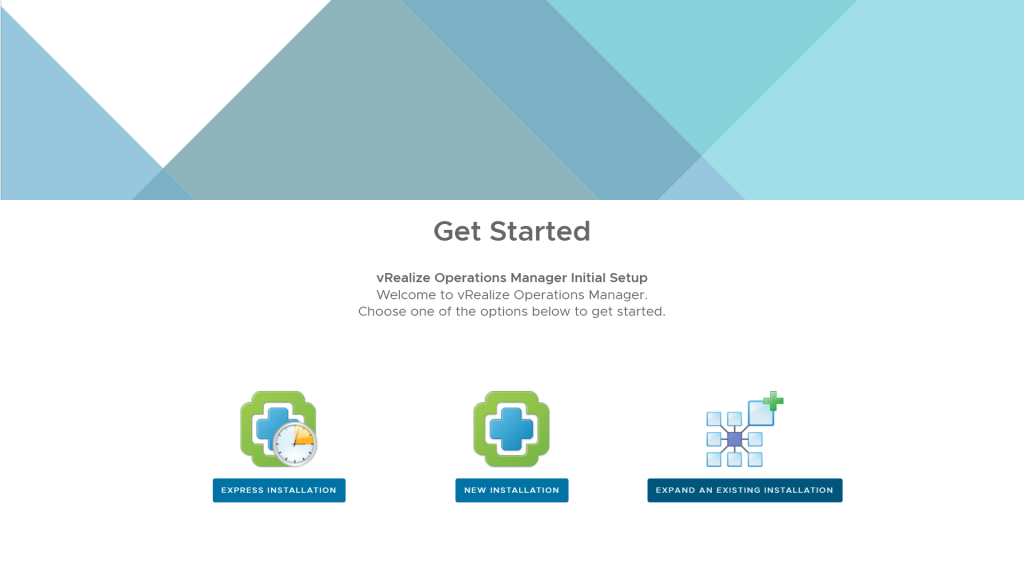
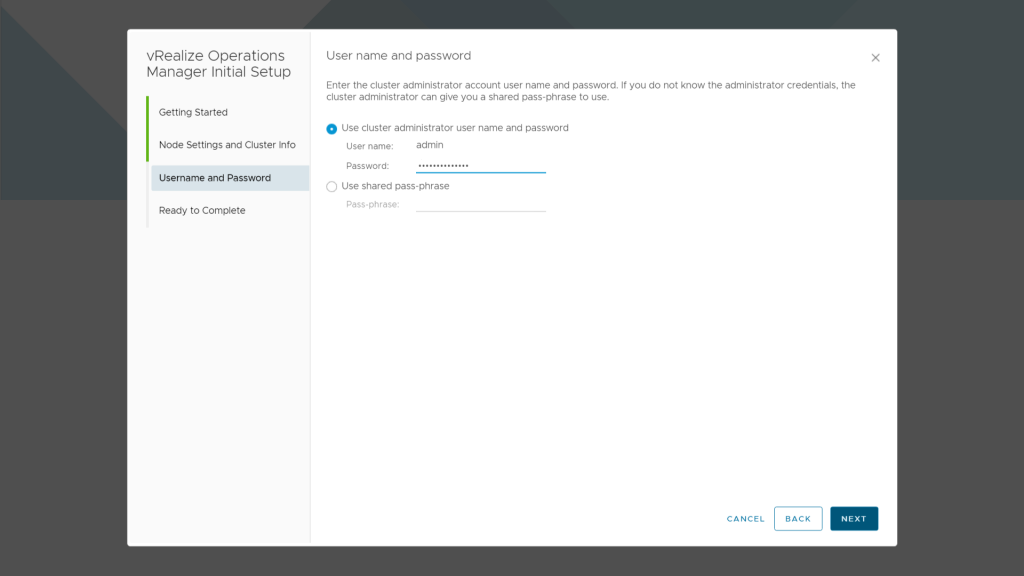
According part1, In first DataCenter we intstalled and configured vRops 8.5 in large mode, Now we are going to add a collector in second dataccenter. Each datacenter has own vCenter server.
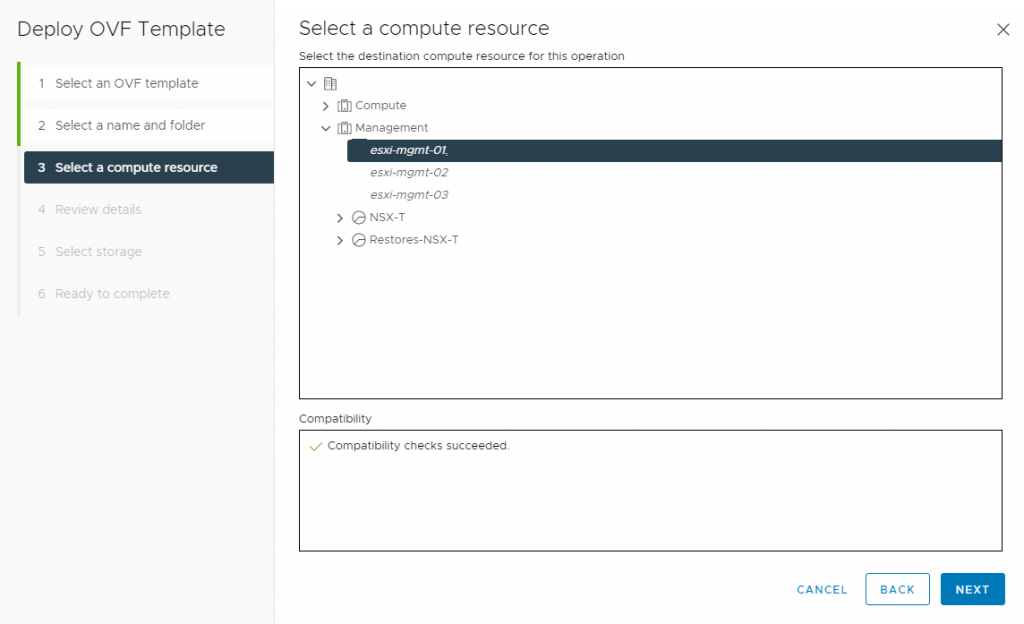
1- Select an OVF template
2- Select a name and folder
3- Select a compute resource
4- Review details
5- Accept license agreements
6- According the our senario, I select Remote Collector deployment
7- Select storage
8- Select networks
9- Customize template [ Your Gateway, Domain Name, Domain Search Path, Domain Name Servers, Network IP Address and Network Netmask]
In first DataCenter we want to intstall and configure vRops 8.5 in large mode, Analytics nodes, witness nodes, and remote collectors have various hardware requirements for virtual machines and physical machines. You can find more information about the components to install on each server profile in your deployment, and the required hardware specifications, see the KB article vRealize Operations Manager Sizing Guidelines (KB 2093783).
1- Select an OVF template
2- Select a name and folder
3- Select a compute resource
4- Review details
5- Accept license agreements
6- According the our senario, I select Large deployment
7- Select storage
8- Select networks
9- Customize template [ Your Gateway, Domain Name, Domain Search Path, Domain Name Servers, Network IP Address and Network Netmask]