Hi, Today, I decided to install an unattended vCenter (vCSA) server appliance. You can use the CLI installer to perform a silent deployment of a vCenter Server appliance on an ESXi host or vCenter Server instance.
The CLI deployment process includes downloading the vCenter Server installer on a network virtual machine or physical server from which you want to perform the deployment, preparing a JSON configuration file with the deployment information, and running the deployment command.
Steps:
Step1– Register your vCenter Server appliance A and PTR record on your DNS server. Like this: vc01.khoshraftar.com. Then:
Step 2– You can choose where you want vCSA installed, on one ESXi or one existing vCenter. I will be installing it on an ESXi. Then:
Step 3– Download vCSA ISO, mount it, and navigate to \vcsa-cli-installer\templates\install. This folder contains JSON configuration files, which you can edit and then use with the vCSA command line installer. The JSON files, used in conjunction with command line parameters, provide a way to run an unattended vCSA installation. Then:
I selected the embedded_vCSA_on_ESXi.json file to match the deployment type that I wanted.
Step 4– Copy the selected JSON file (embedded_vCSA_on_ESXi.json) to a local folder on your computer; where you’re running the installer from. Then:
Step5– Using Visual Studio Code or Notepad ++, edit the JSON file as follows. Refer to this link for a complete list of parameters. Then:
Sections 1: Target ESXi Server details.
Hostname
The FQDN or IP of the ESXi host on which vCSA is installed.
Username & password
The credentials needed to access the ESXi.
Deployment.network
The portgroup to which vCSA Management connects.
Sections 2: vCSA deployment details
You must provide the ‘deployment_option’ key with a value, that will affect the vCenter Server Appliance’s configuration parameters, such as the vCenter Server Appliance’s number of vCPUs, the memory size, the storage size, and the maximum numbers of ESXi hosts and VMs which can be managed. For a list of acceptable values, run the supported deployment sizes help, i.e. vcsa-deploy –supported-deployment-sizes.
thin.disk.mode
Determines if the vCSA’s disks are created using thin disk mode.
Deployment.option
Refer to this to review the available deployment types.
Name
The name assigned to vCSA’s VM; is displayed in the inventory.
Sections 3: vCSA network details
ip.family
The IP version used (4 or 6) for the network configuration.
mode
Determines if static and dhcp network settings are used.
ip
The IP address assigned to the vCSA.
dns.servers
A comma-separated IP address list of DNS servers configured on vCSA.
prefix
Subnet mask in prefix format (Ex. 255.255.255.0 = 24, 255.255.240.0 = 20).
gateway
The IP address of the default gateway set on vCSA
system.name
The FQDN (hostname) for the appliance.
Sections 4: vCSA OS
password
The root password is used to access vCSA’s via SSH, VAMI, or otherwise.
ntp_servers
Set your NTP server IP address
ssh.enable
Set to true to enable SSH access by default.
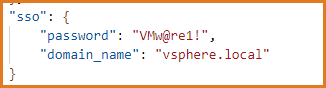
Sections 5: SSO details
password
This is the password for administrator@vsphere.local.
domain-name
The SSO domain name (you can leave it as is).
Step6– Open an administrative command prompt and navigate to \vcsa-cli-installer\win32 on the mounted ISO image. Then:
Step7– Perform an Installation using vcsa-deploy install. Then:
I downloaded VCSA 8.0 ISO from VMware.com and run the installer.
I choose Install.
1-Introduction
Note: The external Platform Services Controller deployment has been deprecated.
Note: Installing the vCenter Server is a two-stage process. The first stage involves deploying a new vCenter Server to the target ESXi host or a compute resource in the target vCenter Server. The second stage completes the setup of the deployed vCenter Server. Next
2- License agreement, click on the checkbox. Next
3- Specify the vCenter Server deployment target settings. The target is the ESXi host or vCenter Server will be deployed.
On this page, fill in all the blank fields, Next
Accept the certificate warning and click NEXT
4- Enter the new VM name for your VCSA 7.0 Update 3 and set the root password for it, NEXT
5- Select your deployment size, I choose Medium Size. NEXT
6- Select data store, you can select Thin or Thick disk mode, NEXT
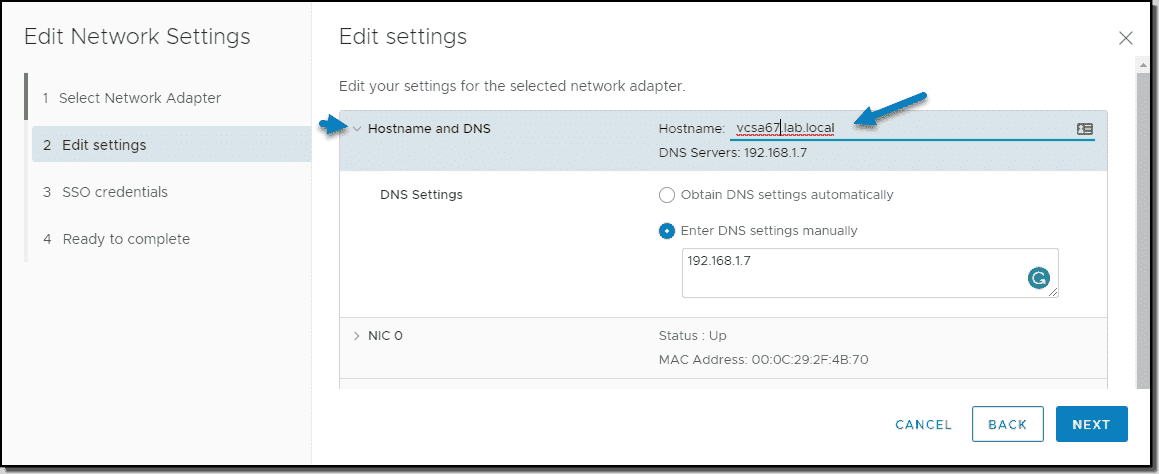
7- Configure your network settings, NEXT
10- The installer will begin deploying the new VCSA according to the settings you provided. Finish
1- The second stage process. NEXT
2- Set your Time and NTP servers, and you can enable or Disable SSH access to vCenter Server.
3- You have two option2: 1-Create a new SS domain or 2-Join an existing SSO domain
4- You can now join VMware Customer Experience Improvement Program. This basically allows VMware to collect certain sanitized data from your environment, which could help with future releases.
5-Install – Stage 2
6- This process took about 45 minutes for me.
9- Login to the VCSA by the FQDN or IP address and proceed.
Log in to the vCenter Server Appliance using SSH and root credentials.
Run this command to enable the Bash shell:
shell.set –enabled true
Type shell and press Enter.
Use these commands to verify which disk is experiencing disk capacity issues, then trace which SCSI ID will show in the VM edit settings:
df -h; lsblk; lsscsi
5- Using the VAMI address –> https://vcenter:5480 –> Monitor –> Disks
You can find the Hard Disk number that you must be increased.
6- Using the vSphere Client or vSphere Web Client, locate the vCenter Server Appliance virtual machine and increase the disk space on the affected virtual disk.
7- After the virtual disk is increased, return to the SSH session and run this command to automatically expand any logical volumes for which the physical volumes are increased:
/usr/lib/applmgmt/support/scripts/autogrow.sh
8- Run this command to confirm that the virtual disk has successfully grown:
Hi, If you set a proxy for your vCenter version 6.7.0.46000 , and it is not working, this post is fit for you.
Today I configured a proxy from UI for vCenter version 6.7.0.46000, but it is not working.
1- login to VAMI.
Https://vcenter-ip-address:5480
Login as a root user.
2- Networking –> Proxy Settings
{This configured not working}.
What is a solution?
It has a trick.
3- Login to VAMI with SSH client like putty.
4- vi this file
/etc/wgetrc
5- Put your proxy address in this file
# You can set the default proxies for Wget to use for http, https, and ftp.
# They will override the value in the environment.
https_proxy = https://proxy_address:port/
http_proxy = http://proxy_address:port/
We’ve reviewed and changed the lay-out for ESXi system storage partitions on its boot device. This is done to be more flexible, and to support other VMware, and 3rd party solutions. Prior to vSphere 7, the ESXi system storage lay-out had several limitations. The partition sizes were fixed and the partition numbers were static, limiting partition management. This effectively restricts the support for large modules, debugging functionality and possible third-party components.
That is why we changed the ESXi system storage partition layout. We have increased the boot bank sizes, and consolidated the system partitions and made them expandable. This article details these changes introduced with vSphere 7 and how that reflects on the boot media requirements to run vSphere 7.
The partition sizes in vSphere 6.x are fixed, with an exception for the scratch partition and the optional VMFS datastore. These are created depending on the used boot media and its capacity.
Consolidated Partition Layout in vSphere 7
To overcome the challenges presented by using this configuration, the boot partitions in vSphere 7 are consolidated.
The ESXi 7 System Storage lay-out only consists of four partitions.
System boot
Stores boot loader and EFI modules.
Type: FAT16
Boot-banks (x2)
System space to store ESXi boot modules
Type: FAT16
ESX-OSData
Acts as the unified location to store extra (nonboot) modules, system configuration and state, and system virtual machines
Type: VMFS-L
Should be created on high-endurance storage devices
The OSData partition is divided into two high-level categories of data called ROM-data and RAM-data. Frequently written data, for example, logs, VMFS global traces, vSAN EPD and traces, and live databases are referred to as RAM-data. ROM-data is data written infrequently, for example, VMtools ISOs, configurations, and core dumps.
ESXi 7 System Storage Sizes
Depending the boot media used and if its a fresh installation or upgrade, the capacity used for each partition varies. The only constant here is the system boot partition. If the boot media is larger than 128GB, a VMFS datastore is created automatically to use for storing virtual machine data.
For storage media such as USB or SD devices, the ESX-OSData partition is created on a high-endurance storage device such as an HDD or SSD. When a secondary high-endurance storage device is not available, VMFS-L Locker partition is created on USB or SD devices, but this partition is used only to store ROM-data. RAM-data is stored on a RAM disk.
ESXi 7 System Storage Contents
The sub-systems that require access to the ESXi partitions, access these partitions using the symbolic links. For example: /bootbank and /altbootbank symbolic links are used for accessing the active bootbank and alternative bootbank. The /var/core symbolic link is used to access the core-dumps.
Review the System Storage Lay-out
When examining the partition details in the vSphere Client, you’ll notice the partition lay-out as described in the previous chapters. Use this information to review your boot media capacity and the automatic sizing as configured by the ESXi installer.
A similar view can be found in the CLI of an ESXi host. You’ll notice the partitions being labeled as BOOTBANK1/2 and OSDATA.
You might notice the OSDATA partition being formatted as the Virtual Flash File System (VFFS). When the OSDATA partition is placed on a SDD or NVMe device, VMFS-L is labeled as VFSS.
Boot Media
vSphere supports a wide variety of boot media with a strong recommendation to use high-endurance storage media devices like HDD, SSD and NVMe, or boot from a SAN LUN. To install ESXi 7, these are the recommendations for choosing boot media:
32GB for other boot devices like hard disks, or flash media like SSD or NVMe devices.
A boot device must not be shared between ESXi hosts.
Legacy SD and USB devices are supported with some limitations listed below, more information in this FAQ.
To chose a proper SD or USB boot device, see Knowledge Base article 82515.You must provide an additional VMFS volume of at least 32 GB to store the ESX-OSData volume and required VMFS datastore. If the boot device is larger than 138 GB, the ESXi installer creates a VMFS volume automatically. Delete the VMFS datastore on USB and SD devices immediately after installation to prevent data corruption. For more information how to configure a persistent scratch partition, see Knowledge Base article 1033696.
If the VMware Tools partition is stored locally, you must redirect it to the RAM disk. For more information, see Knowledge Base article 83376.
You must use an SD flash device that is approved by the server vendor for the particular server model on which you want to install ESXi on an SD flash storage device.
Today, my boss told me we need to move 2 virtual machines from vCenter 6.7 to vCenter 7. And we need to move 1 virtual machine from vCenter 7 to vCenter 6.7. VMware has a solution for these scenarios.
Now, for vSphere 7.0 Update 3, the feature is further enhanced to support bulk clone operation! In addition, there are some quality improvements such as a new enhanced vCenter Server connection form and a new icon.
Prerequisites
Obtain the credentials for the administrator account of the vCenter Server instance from which you want to import or clone virtual machines.
Verify that the source vCenter Server instances are version 6.5 or later.
Verify that the target vCenter Server instance is version 7.0 Update 1c or later if you want to import virtual machines to another vCenter Server instance.
Verify that the target vCenter Server instance is version 7.0 Update 3 if you want to clone virtual machines to another vCenter Server instance.
Scenario1:
Import Workflow:
In order to clone several virtual workloads from another vCenter Server to the current one, right-click on the destination host/cluster and select the “Import VMs” action.
After that, enter the credentials of the source vCenter Server in the import connection form.
On the next screen, select the workloads that should be cloned.
When you complete the wizard, the workloads will be cloned to the destination vCenter Server.
Scenario2:
Export Workflow:
Select the virtual workloads that should be cloned to a foreign vCenter Server and click on “Migrate…”
On the next screen, make sure to select “Cross vCenter Server export” option.
Then, select the destination vCenter Server and, when you complete the wizard, all workloads will be cloned there.
With the enhancements to the XVM in vSphere 7.0 Update 3, users are able to perform a bulk workload clone operation between different vCenter Servers. This makes the feature more versatile and suits a variety of use cases, some of which are:
Migrating/cloning VMs from an on-premise to a cloud (VMware Cloud) environment
Quicker adoption of the new vSphere versions by migrating/cloning the workloads from the old vCenter Server
For a more detailed information of the usage and requirements, please see the official documentation.


